Tuesday, December 10, 2013

TOA 9000M2 Software Part 9 - Output Assignments & Crosspoints

Setting Output Assignments


In this tutorial you will learn how to configure output assignments  with the TOA 9000M2 GUI Software application.

Click on the Crosspoint Matrix block to call up the output Assignment view.

The crosspoint matrix represents inputs assigned to outputs with inputs represented as rows and outputs represented as columns.

New projects default to all inputs assigned to all outputs, represented by orange box. Clicking a box will turn the box to RED and will activate the cross-point fader. This fader adjusts the selected input channel's contribution to that output channel.

Click the button again to turn the output assignment off.

Keep in Mind that any source input that has been assigned assigned with a priority will not be included in this view. Priority inputs are managed in the paging settings. In this example Input 2 has been assigned a priority and is therefor not included in the output assignment view.

You may click the ADJUST button to transmit your Output Assignment settings to a connected 9000M2 unit.


Be sure to visit our YouTube page for more 9000M2 Software tutorials.

Tech Tip: How To Resolve A MAC Addressing / IP Conflict

By Rick Escobar, Product Support Assistant Manager

Anyone who works with equipment that has a MAC address and IP address have run into the main topic of this tech tip. Heck even a banana these days has networking as a feature. 

Problem: Cannot login to a unit or even ping it with a windows operating system.

Explanation:
Let's use two of TOA's NX-100 units, and set them both to maintenance mode. (NOTE: many TOA products have an IP Address of 192.168.1.1 right out of the box)
Connect one of the units to your switcher.
Open a DOS prompt and enter 'ping 192.168.1.1'

Result: The unit will pass the ping test without an issue.

NOTE: From a DOS prompt type 'arp -a' this will display the MAC address currently associated with 192.168.1.1

Now, move the Ethernet cable to the second NX-100 unit and again ping 192.168.1.1

Expected Result: Good chance your ping test will time out. If you type 'arp -a' again, you will see that it is still using the previous NX-100 MAC address.

TIP: You can use your QWERTY up / down arrows to use a previous typed command.

What's going on?:
Your PC is still associating the previous MAC address with 192.168.1.1. This is stored in the Windows Address Resolution Protocol (ARP) Cache. Windows Vista, XP and 7 should release the ARP Cache all on its own after 2 minutes. However, if you are moving quickly, you are very likely to run into this issue, and may even end up in a loop where it may appear as if your unit is defective. Also, I have encountered an operating system that was not releasing the ARP Cache, and forcing a refresh was the only option.

Solution:
From the DOS command prompt enter 'netsh interface ip delete arpcache'. This will force the ARP cache to refresh and allow you to connect to the unit you were unable to connect to before.

Tuesday, October 1, 2013

TOA 9000M2 Software Part 2 - Overview Main Settings Window

By Sean Barton - TOA Area Systems Engineer West


In this tutorial you will become familiar with the Main Settings Window in the TOA 9000M2 GUI Software application.

The Scene Memory View displays the list of 32 SCENE memories, as well as the currently selected scene. A SCENE is a memory preset containing all of the channel and routing settings associated with a given application. Each scene may be named and also assigned to be a power-on default.

The Main I/O Configuration View - This window provides an overview of the entire unit’s Input / Output configuration. It will show all channel names, available DSP & signal routing. Clicking on any “block” will call up that parameter in the edit window below.

The Active Edit View displays the currently selected parameter. When editing a parameter in the main view window, that channel & the specific parameter will be highlighted in both windows.

Monday, September 2, 2013

Tech Tip: Guide to Troubleshooting

By Rick Escobar - Product Support Assistant Manager

We have all been there. Something we are working on just will not work and we find our shelves stumped. I’m going to do my best to offer a process for working through any problem.

Where’s the problem? It’s often the simple stuff that gets you. I find it best to first establish where it is working and reverse engineer from there. Let’s take a simple system that consists of an iPod audio source, amplifier/mixer, and speakers. In this case everything seems fine but no sound is coming out of the speakers.


Is there signal from the iPod? Using a pair of head phones will quickly establish if there is a signal.
 

Test the Cable
Is the volume up on the amplifier? Try different Inputs. Is there an auxiliary output you can listen to?If the amplifier is verified as working then try a short cable to a known working speaker and connect to your amplifier output. This will rule out any wiring issues.

Now let’s look at some tools useful for troubleshooting.
  • Product Knowledge: Having some information on the product capabilities and requirements can be invaluable. This is especially true for more complicated systems. This includes reading the manual, no one likes to do it but the solution may be just an index away. Of with a PDF ctrl F and a key word search is your friend.
  • System Knowledge: For example a microphones require pre amplification so hooking up to a line level input may produce nothing or a very low signal. The Devil will be in the details.
  • The Internet: It’s amazing the amount of information that is out there. Sometimes a quick search will turn up a quick solution. I may be someone has already had the same issue. This also would include user groups. There are tons of these for all kinds of subjects and in general these groups are very helpful.
  • Tech Support: When all else fails, break glass in case of emergency.
How to explain a problem so that even an engineer will understand it.

The best problem descriptions look more like a cooking recipe than anything else. You will get what is a being made, a summary of what it may taste like and steps to reproduce and an expected result. 

Here’s a example of a Cake Gone Bad:
Mom's Chocolate Cake
Summary: The Cake did not rise
Recipe:
Mix batter per instructions
Cook at 325 for 2 hours
Result: Cake did not rise
Expected: Cake should have risen
 

Now the chief could look at this, review the mixing instructions and other steps. Maybe it was the incorrect temperature, maybe the yeast was bad. But from this point it is easy to keep moving forward to find a solution.

I tried to keep this short and to the point, of course a complicated problem can be very time intensive but the process of moving forward to a solution pretty much stays the same.

When all else fails, don't hesitate to give my team a call at 800-733-4748.

Monday, August 5, 2013

Top 5 Ways to Quickly Program the D-901 Digital Mixer From the Front Panel

By Sean Barton - TOA Area Systems Engineer for the Western Region

Ever wonder how to program a D-901 mixer quickly without a computer? While you can always program the D-901 Digital Mixer with the TOA GUI software, you can also quickly configure powerful features right from the front panel! Here are the top 5 techniques to program the D-901 without ever turning on your computer:

  1. Assigning Inputs to Outputs - Assigning an audio source input to an output is one of the simplest programming features on the D-901 the front panel. To do this, simply hold down the desired Input Channel Selector button, then press the desired Output Channel Selector Buttons that correspond to where you want to send the source signal. As you do this you will see your outputs indicated on the front panel LCD screen.
  2. Assign a Source to the Mic Bus - Sources that are assigned to the Mic Bus are routed through a 12-band feedback suppressor with fixed or dynamic frequencies. To assign a source to the Mic Bus, simply hold down the desired Input Channel Selector button and then press the Microphone Bus Selector Key [SEL]. As you do this you will see "M" the front panel LCD screen indicating if the input channel is assigned to the Mic Bus. BONUS TIP: The default mic bus setting for all channel inputs is ON. For a new install, be sure to disengage the mic bus for each input to start from scratch.
  3. Change The Mic Bus Output Settings - Out of the box, the D-901 Mic Bus defaults to be routed to all 8 outputs. To change the Mic Bus output assignments, simply press and hold the Mic Bus [SEL] button and rotate the Setting knob to select the output channel bus (1 - 8), then press the function ON/OFF key to enable or disable the assignment. When disabled (OFF), the "-" indication is displayed.
  4. Save New Presets - When you write a new preset, always remember to save your work! To do this, simply press the left and right arrow keys to select the desired preset memory number to which you want to save your settings. Then, press the Setting knob to execute the function. You're done!
  5. Stereo-Link Input Sources - Do you have a balanced stereo input signal? You can easily link two input channels so Input trim, EQ and other settings are shared between the channels. To do this, simply rotate the Setting Knob to select the channels to be Stereo-Linked. Then, press the function ON/OFF key to enable or disable the Stereo-Link setting.
Our Product Support Department is always here to help should you need any assistance. 888-733-4748

Thursday, August 1, 2013

Technology Demystified: All about the TOA DP-K1 -or- What on earth is ARC processing anyway?

OK, so DSP (or Digital Signal Processors) are not new and today are as ubiquitous as smart phones. Most of them would seem to do just about everything it used to take a rack’s worth of gear to do (EQ, Compression, Delay, etc…). So what sets them apart? Well, that really depends on your application. A DSP used for a conferencing applications will likely use some very different tools (like auto echo-cancellation & auto mixing) from one used for a live venue (where things like Delay, Limiting & Crossover functions would be considered more vital). Many DSP units try to be all things to all people and while that may win points for versatility, there are often compromises with respect to each function. Others are focused more on particular applications. It is in this area where the TOA DP-K1 shines.
First, you should know (if you don’t already) that TOA is not a newcomer to the world of DSP. In fact, TOA introduced the very first, open architecture, multi-function, multi-channel DSP to the Pro/Commercial marketplace. The year was 1988 and the product was the SAORI.  What followed was nothing less than a revolution for our industry. Even 25 years later, the SAORI has its fans and many units are still in operation today in venues throughout the world. The DP-K1 is one of the latest in a generation of legacy DSP products, the result of years of development and research by our engineers in Japan.

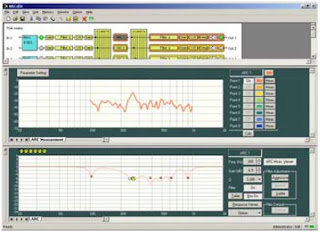
So what does the DP-K1 do?  Well, it shares a modular architecture with other TOA DSP models (such as the D-901 & D-2000), making available a common “library” of Input, Output & Control options. It therefore allows a range of custom configurations (up to  8 In x 8 Out) depending on needs. Inside, the DP-K1 has a compliment of Input processing (Parametric EQ, Filters, Compression, Gate) & Output processing (more Parametric EQ, Filters, Compression, Delay & Crossover), with the ability to matrix inputs to outputs in any combination. While the DP-K1 obviously has ample tools to function primarily as a “back-end” processor for speaker system management, it can actually function as a DSP mixer when necessary (inputs can be set to Mic or Line level and most modules come equipped with preamp gain & phantom power). However, the real power of the DP-K1 comes right between the Inputs & the Outputs. Each of the 8 buses of the DP-K1 comes equipped with an independent Automatic Resonance control (or ARC) processor.

What the ARC processor does is truly unique and would normally require more extensive processing and hours spent by a trained acoustical or sound engineer.  The DP-K1 is designed to compensate for resonant nodes which often occur in large acoustic spaces and which have a tendency to negatively impact intelligibility, especially with voice. What does all that techno-babble mean? Well, we’ve all been in a large church or school gymnasium at some point, right?  Remember how the sound of the pastor’s voice seemed to ring on forever and you couldn’t make out a word? Or how the sound of bouncing basketballs seemed like a construction site and announcements left you wondering if the home team won or lost (guess that’s why we have scoreboards)? Anyway, that’s due to the hard surfaces and reflected sounds in the space which pile up at certain frequencies to the point where the amount of reflected sound energy exceeds the direct (or desired signal’s) energy. This happens most often at lower and sometimes mid-range frequencies. Not surprisingly, the result is -MUD!  Over the years, efforts to solve this acoustic nightmare have yielded some real innovations. Today, line array speaker technology can help to focus the sound energy more directly to the listener and reduce the amount of reflected sound. Sometimes, acoustic treatment can be added to the space to help reduce reflections, though this solution is not always possible (think of a large gothic church) or cost-effective. Through DSP manipulation of the sound output, it is possible to reduce the energy at the frequencies that are the most troublesome. However, in many cases the problem may still persist or the equipment, time and expertise required to effectively resolve it is beyond the reach of most people.
 
Enter ARC. ARC is a patented TOA technology designed to streamline the process by which this type of solution is applied. By using the simple tools provide by the DP-K1, it’s relatively easy to measure the reverb characteristics (and thereby the resonant nodes) of any given space using just an everyday vocal microphone (no expensive reference mic required). By automatically compiling this data (something the DP-K1s processor does very quickly) it calculates the appropriate equalization curve necessary to reduce the nodal effects of the space and thereby greatly increasing the system’s intelligibility. This all done through the software interface via a networked PC. Up to 8 locations may be measured per ARC processor (allowing you to get the best “average” for the space). Unlike overall room EQ, where factors such as temperature, humidity and occupancy are important,  ARC measurements taken when the space is empty and on a cool, dry day will be equally applicable when the room is filled to capacity and the temperature and humidity are much higher. These do not affect the nodal response to any great degree.

In a world flush with DSP products screaming for attention, the DP-K1 stands out as a unique and valuable tool, which should find itself into the arsenal of any sound system designer. Where problems like the ones described above are encountered, the DP-K1 is the solution. ARC processing may also be found in other TOA DSP products, like the M-633D and the new M-864D digital mixers. For a DP-K1 demo (yes, hearing IS believing), please contact your TOA Rep today. For more information visit the DP-K1 webpage by clicking here.

Wednesday, July 10, 2013

TOA Introduces New DP-SP3 Digital Speaker Processor


TOA Electronics, Inc., a subsidiary of TOA Corporation, revealed its new DP-SP3 Digital Speaker System Processor at InfoComm13. The DP-SP3 is 2-input x 6-output DSP operating at 24bit/96k resolution and is designed to handle all speaker system management functions.  It is housed in a 1U chassis and can be connected to other system components via balanced removable Euro-block connectors. The DSP includes comprehensive tools for achieve optimized sound system performance including: 12-band filter section per channel (with a choice of parametric, Hi or Low shelving, HPF/LPF, notch, band-pass, all-pass & horn eq. different slope types are also selectable), Compression, Delay and Attenuation. The DP-SP3 can be programmed and controlled via proprietary GUI software connected via Ethernet to a Windows PC. It can also function with any web browser and allows access to basic functions (such as passwords and IP settings) plus a library of TOA speaker EQ/Crossover presets. The DP-SP3 may also be synchronized for preset selection along with the M-864D Digital Mixer by using the provided contact Ins & Outs. The DP-SP3 carries TOAs 5-year Audio Product Warranty.


Monday, July 1, 2013

Troubleshooting RS-232 Command Strings to TOA Products

By Rick Escobar - TOA Product Support Assistant Manager
 
One issue we hear from time to time is that “My Brand X” controller cannot control a TOA product by sending RS-232 commands.


For this example, let’s refer to a 9000M2 series Matrix / Mixer Amplifier (for you references download this document “9000M2 RS-232C Protocol Manual” by clicking here).


We’ll skip the low level detail and get to the point on how to make your control surface work for you. The 9000M2 is looking for a hexadecimal string that it will read, then react to the instructions sent.
 

Here is an excerpt from the “9000M2 RS-232C Protocol Manual”:
 

5.5 Power ON/OFF
 

This command performs ON/OFF setting of the power switch of the 9000M2 Series
Amplifier. 9000M2 Series Amplifier responds with the same data as that received.
 

F4H, 01H, <ON/OFF>
 

Example 1: Setting the power switch to OFF
    F4H, 01H, 00H
 

Example 2: Setting the power switch to ON.
    F4H, 01H, 01H


A common misconception is that the H is required in the command string. However, in this case it’s just noting that F4 is going to be a hexadecimal number. There is no standard for different control manufactures or terminal programs. So the first step to understand how the device you are working with, is going to want this string formatted.
 

All of these examples could be valid to power the 9000M2 off:
\xF4\x01\x00
#F4#01#00
[F4][01][00]
And so forth. 


The best recommendation would be to have the ability to cross check a string with a Terminal Program. This way if the hardware controller does not work, but the software terminal does, then you have isolated the issue most likely to how the device in question wants the string formatted.
 

A key word search on the internet for “RS-232 terminal emulator” will turn up several programs that provide you the ability to send RS-232 to your TOA product.
 

Good Luck and Happy RS-232 Programming!

Wednesday, June 5, 2013

TOA Introduces New SR-D8 Active Line Array


TOA will debut its new SR-D8 Digitally Active Line Array at InfoComm13.  The SR-D8 contains 8 "cells", each with a compliment of a 4" low frequency speaker and a coaxially-mounted array of 3 - 1" dome tweeters Each cell is powered by an independent Class D amplifier. The SR-D8 System comprises two different models: The SR-D8-M (Master) and the SR-D8-S (Slave). A single SR-D8-M may be connected to up to three SR-D8-S units for linear 4-speaker array. A total of 16 SR-D8s may be connected in any given system. Each SR-D8-M has an input via balance analog line or CobraNet. The signal may be daisy-chained to other SR-D8-Ms via an AES/EBU link. The SR-D8s advanced 24bit/96k on-board DSP is controlled via supplied GUI software and is also accessible via web browser. The software provides full control of all SR-D8s in the system. It is possible to control the beam angle within a +/- 45 deg range and the beam may also be split two ways at any point along the array (from single to four-speaker configuration). The GUI software provides a full-compliment of parametric EQ, compression, delay and beam control. The GUI also displays a predictive preview of beam propagation for any configuration. One main advantage is the calculation time-from configuration selection to execution, the process time is instantaneous! This line array speaker is ideally suited for large atrium spaces, auditoriums & Houses of Worship. The SR-D8-M & SR-D8-S carry TOAs 5-year Audio Product Warranty. The SR-D8 System will be available for sale in the Summer of 2013. Visit the webpage for this product for more information and software downloads.

Wednesday, May 29, 2013

TOA Introduces New M-864D Digital Mixer


TOA will debut its new M-864D Digital Rack-mount Mixer at InfoComm13. The M-864D is housed in a 4U rack chassis and is based on a next-generation 24bit/96k DSP. It has a compliment of 8 Balanced Mic/Line Inputs (using removable balanced Euro-block connectors), plus 2 Stereo channels, each of which may be assigned any (or all) of three Stereo Line inputs (on RCA connectors) plus an additional 1/8” stereo input on the front panel. These may all be selected remote. The front panel features easy access controls for most basic functions, including  linear fader volume controls for each channel, and up to 16 of TOA’s ZM-remote wall controllers may be directly connected and programmed for volume, scene select and various other functions. The M-864D can be programmed and controlled from the supplied GUI software via Ethernet connection to a Windows PC. The units DSP compliment includes a 3-band EQ for each inputs channel, Input Trim, Phantom Power and a Mute/Duck circuit allowing the mic/line channels to override the stereo inputs to allow for paging over BGM functions. Each mic channel also includes an independently selectable and adjustable Feedback Suppressor to provide optimal gain before feedback when using microphones. The 4-bus output section includes a 10-band parametric EQ and ARC (Automatic Resonance control) processor. The patented, exclusive TOA DSP (originally introduced in the TOA DP-K1) quickly and effectively reduces the worst effects of reverberant spaces, maximizing speech intelligibility. The M-864D is ideal for use in multipurpose meeting rooms, gymatoriums and other large spaces.. Its cost-effective, feature-packed design and easy-to-use interface will make it an easy choice for schools, conference centers and houses of worship. The M-864D carries TOAs 5-year Audio Product Warranty and will be available for sale in the Spring of 2013.

Wednesday, May 15, 2013

TOA at InfoComm13

TOA Electronics invites you to visit booth #1343 in the Audio Pavilion at InfoComm in Orlando, FL, from June 12-14th, 2013. TOA will be displaying its Paging, Sound Reinforcement and Intercom system solutions focusing primarily on HOW, Educational, Corporate Boardroom & Mass Notification, with live demonstrations of its systems in an applications-based environment.

Featured products on display will include:
  • M-864D Digital Rack-Mount Mixer
  • DP-SP3 Digital Speaker System Processor
  • SR-D8 Digitally Steerable Line Array Speakers
  • WT-5100 Portable UHF Tuner
  • IR-802  Wireless Infrared Classroom Sound System
  • VM-3000 Emergency Voice Evacuation System
  • PC-580RU UL-rated Ceiling Speaker
  • AV-20D Plenum-rated Class D Micro Amplifier
  • D-2000 Digital Mixing System
  • N-8000 IP Intercom. New Video & ADA Compliant Stations
  • Much more….
TOA will also be hosting a training session entitled “Understanding Mass Notification vs. Voice Evacuation”, Friday June 14th at 10:30am. The course is $25, which you can pay for with InfoComm credits.  You can register for this course by clicking here. Don’t delay, as space is limited!

Thursday, May 9, 2013

Tech Tip: 70V output of the AV-20D


By: Yusuke Ueno
The MT-S0301 matching transformer allows for a 30W @ 70V output by connecting to the bridge output of the AV-20D. With this combination, the plenum-rated 70V amplification system can be achieved with a perfect plenum installation when installing the MT-S0301 inside of a plenum-rated speaker backcan, such as the HY-BC580U. The competitive plenum-rated compact amplifier still needs the external non plenum-rated power supply which must be installed outside of the plenum space. This system can therefore be a low cost solution with less installation fees and a less expensive 70V ceiling speaker such as the PC-580RU.