By James McGuinness, Product Support Specialist
We get lots of questions regarding the various uses for the serial RS-485 ZM-9011, ZM-9012, ZM-9013 and ZM-9014 remotes. One popular one is about volume control. Now the ZM-9012 (rotary volume only) and the ZM-9014 have a dedicated rotary volume control and it can be assigned to be an input channel volume control, an output channel volume control, a grouped input channel volume control or a grouped output channel volume control. But did you know that you can make the buttons on so equipped serial remotes into volume controls similar to the functionality of a ZM-9001 or ZM-9002 wired remote control? The only requirement is that you have available pairs of contact inputs and outputs available for this application.
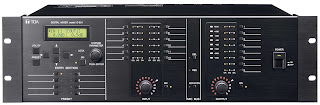
So for this example let’s use an A-9060SM2 where we are going to have two inputs with button volume controls and a master output volume control using a ZM-9014 serial remote control. Of course to complete the basic equipment list you will need an input module such as the D-001T, an RC-001T serial remote control module, and its power supply the AD-246.
For connections we will not go over the basic input and output
connections, and the basic RC-001T connections which you should know by
now. Of course if you need a reminder, examples are available in the
instruction manual. However, let’s look at the connections required for
this application as they apply to the 14 pin control connector.
Standard Control Port Available On All 9000M2 Mixers Shown Above
We are going to marry two sub-systems together, the RS-485 serial remotes along with our contact closure circuits. To start to make this application work, we need to connect 4 input contact closures to 4 output contact closures. The reason for this is we can control the output contact closures with the serial remotes and operate them via the buttons on the remote, and we can set the input contact closures for volume control use. Can you see where we’re going with this?
In the picture below you will see the physical connections necessary to make this work. It’s simple, connect input 1 to output 1 and so on. A ground or “E” connection is not necessary as we are not connecting off the mixer itself, so internal ground will take care of it.
Now you have all the connections necessary to make this work, so let’s take a look at the programming screens to finish the control.
First we want to go to Setting and then C-IN Setting…
On the next page you will see the options available for the C-IN control. In our example we choose volume up and down twice as shown under Parameter and the input sources are married to a pair of volume up and down contacts using the Channel/Scene dropdowns. You then can choose the resolution of the button presses between 0.5dB ~ 10dB in their respective dropdowns. We have chosen 1dB in this example.
Once this is all done click OK and the screen will save and close. Now we will move on to the serial remote settings.
First go to Setting and then Remote Setting Wizard…
On the next screen you will see the remote settings page for 2-wire remote controls which are the
ZM-9001 & ZM-9002 which we are not using. Select None for both Remote Volume 1 & 2 and click Next.
Then we will get the serial remote start page.
On the initial serial remote setup page above, select 1 remote, Simultaneous Mode, and the ZM-9014 remote options. The ZM-9014 comes set from the factory at address 0 so you won’t need to change this typically. However, please check that the software setting for address matches the remote’s setting. Normally you will start at address 0. Now the reason why we chose Simultaneous Mode for this exercise is let’s say this is for a conference area. The mic may need to be on at the same time as the BGM music or audio source. This setting will allow that. If set to Exclusive mode, you will only be able to choose one input at a time and pressing the volume keys may in some cases affect your input source. Okay, now click Next.

Now you see the programming screen of the ZM-9014 above. From the Function Select dropdown menus you will select Change C-OUT for all 4 buttons. Under Assigned Value you have 2 options, Level and Toggle. This is somewhat confusing. I would rather have the terms Pulse for Level and Latch for Toggle. So for our application we want to choose Level “Pulse” for all four dropdowns. To the right of this option you have dropdowns which are unlabeled. These dropdowns are the contact control output settings. Set the options as shown 1 ~ 4 as we have used buttons 1 ~ 4 in order and that’s how we wired the contact inputs and outputs earlier in our discussion. Lastly for the rotary volume control, select Output Volume and the Assigned output channel 01. Then click Finish.
Now you’re all set. Your ZM-9014 will work completely like a volume control. The upper two buttons will be the volume control for the Mic and the bottom two buttons will be the volume control for the BGM or audio input. The rotary volume control will be the master output volume control.
TIP: Now if you want to have more than one of these remotes in the room, no problem. You can add more ZM-9014 volume controls around the room, just program them similarly as the first remote. You will just have different address settings for each on the initial serial remote settings page. The neat thing is that each volume control knows what the other one is doing so the volume display on each volume control will be the same around the room. No wondering what one volume control is doing versus another one.
Happy programming………remotely speaking.
By Sean Barton - TOA Area Systems Engineer for the Western Region
Ever wonder how to program a D-901 mixer quickly without a computer? While you can always program the D-901 Digital Mixer with the TOA GUI software, you can also quickly configure powerful features right from the front panel! Here are the top 5 techniques to program the D-901 without ever turning on your computer:
- Assigning Inputs to Outputs - Assigning an audio source input to an output is one of the simplest programming features on the D-901 the front panel. To do this, simply hold down the desired Input Channel Selector button, then press the desired Output Channel Selector Buttons that correspond to where you want to send the source signal. As you do this you will see your outputs indicated on the front panel LCD screen.
- Assign a Source to the Mic Bus - Sources that are assigned to the Mic Bus are routed through a 12-band feedback suppressor with fixed or dynamic frequencies. To assign a source to the Mic Bus, simply hold down the desired Input Channel Selector button and then press the Microphone Bus Selector Key [SEL]. As you do this you will see "M" the front panel LCD screen indicating if the input channel is assigned to the Mic Bus. BONUS TIP: The default mic bus setting for all channel inputs is ON. For a new install, be sure to disengage the mic bus for each input to start from scratch.
- Change The Mic Bus Output Settings - Out of the box, the D-901 Mic Bus defaults to be routed to all 8 outputs. To change the Mic Bus output assignments, simply press and hold the Mic Bus [SEL] button and rotate the Setting knob to select the output channel bus (1 - 8), then press the function ON/OFF key to enable or disable the assignment. When disabled (OFF), the "-" indication is displayed.
- Save New Presets - When you write a new preset, always remember to save your work! To do this, simply press the left and right arrow keys to select the desired preset memory number to which you want to save your settings. Then, press the Setting knob to execute the function. You're done!
- Stereo-Link Input Sources - Do you have a balanced stereo input signal? You can easily link two input channels so Input trim, EQ and other settings are shared between the channels. To do this, simply rotate the Setting Knob to select the channels to be Stereo-Linked. Then, press the function ON/OFF key to enable or disable the Stereo-Link setting.
Our Product Support Department is always here to help should you need any assistance. 888-733-4748
By Rick Escobar - TOA Product Support Assistant Manager
One issue we hear from time to time is that “My Brand X” controller cannot control a TOA product by sending RS-232 commands.
For this example, let’s refer to a 9000M2 series Matrix / Mixer Amplifier (for you references download this document “9000M2 RS-232C Protocol Manual” by clicking here).
We’ll skip the low level detail and get to the point on how to make your control surface work for you. The 9000M2 is looking for a hexadecimal string that it will read, then react to the instructions sent.
Here is an excerpt from the “9000M2 RS-232C Protocol Manual”:
5.5 Power ON/OFF
This command performs ON/OFF setting of the power switch of the 9000M2 Series
Amplifier. 9000M2 Series Amplifier responds with the same data as that received.
F4H, 01H, <ON/OFF>
Example 1: Setting the power switch to OFF
F4H, 01H, 00H
Example 2: Setting the power switch to ON.
F4H, 01H, 01H
A common misconception is that the H is required in the command string. However, in this case it’s just noting that F4 is going to be a hexadecimal number. There is no standard for different control manufactures or terminal programs. So the first step to understand how the device you are working with, is going to want this string formatted.
All of these examples could be valid to power the 9000M2 off:
\xF4\x01\x00
#F4#01#00
[F4][01][00]
And so forth.
The best recommendation would be to have the ability to cross check a string with a Terminal Program. This way if the hardware controller does not work, but the software terminal does, then you have isolated the issue most likely to how the device in question wants the string formatted.
A key word search on the internet for “RS-232 terminal emulator” will turn up several programs that provide you the ability to send RS-232 to your TOA product.
Good Luck and Happy RS-232 Programming!


